
Diy Spring Decorating Ideas
As an amazon associate I earn from qualifying purchases.

Just as a butterfly emerges from its cocoon transformed and vibrant, your home can shed winter’s dullness through simple DIY spring decorating projects. You’ll discover that transforming your space doesn’t require expensive store-bought items or professional skills—instead, you can create stunning seasonal touches using materials you already own or find in your backyard. From painted terra cotta pots to handcrafted wreaths, these approachable ideas will help you welcome the season’s fresh energy into every corner of your home.
Gather Your Spring Decorating Supplies and Tools
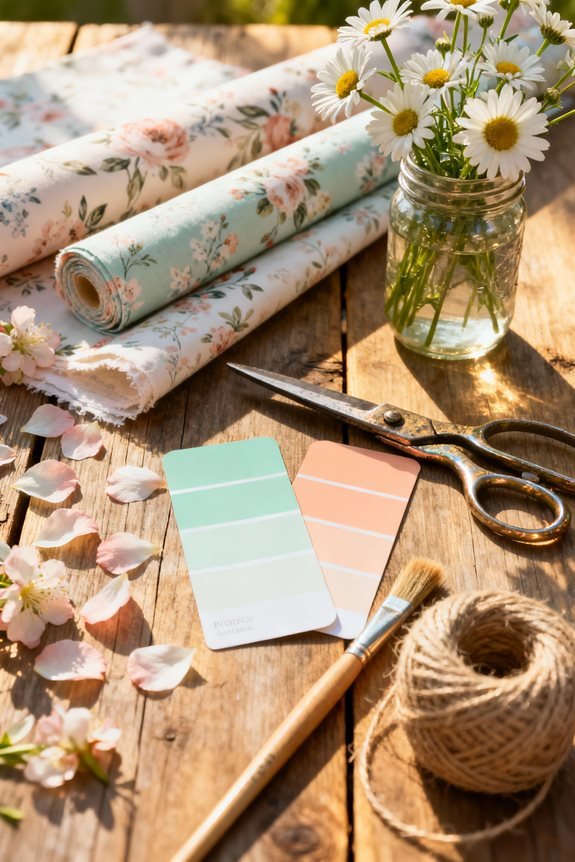
Before you plunge into transforming your home with fresh spring charm, you’ll want to round up the essential supplies that’ll make your decorating journey smooth and enjoyable.
Start by exploring spring color palettes featuring soft pastels, vibrant greens, and sunny yellows that’ll breathe new life into your spaces. Consider your seasonal décor themes—whether you’re drawn to botanical gardens, farmhouse fresh, or coastal breezes.
Stock up on basics like floral wire, ribbon, paint brushes, hot glue guns, and scissors. Don’t forget natural elements like branches, flowers, and greenery that’ll anchor your creative vision beautifully.
Arrange Mason Jar Flowers for Every Room

Mason jar flowers transform any space into a spring sanctuary, and you’ll love how easily these charming arrangements come together with minimal effort.
Start with seasonal flower choices like tulips, daffodils, and hyacinths to capture spring’s essence. Your mason jar arrangements work beautifully in any room when you follow these creative approaches:
Embrace spring’s natural beauty by selecting tulips, daffodils, and hyacinths that bring fresh seasonal charm to your mason jar displays.
- Kitchen counters: Cluster three jars with different heights for visual interest
- Bedroom nightstands: Use single stems in small jars for subtle elegance
- Living room mantels: Line up five matching jars with coordinating blooms
You’ll discover that mixing wildflowers with grocery store finds creates stunning, budget-friendly displays.
Make a Spring Wreath With Backyard Branches and Blooms
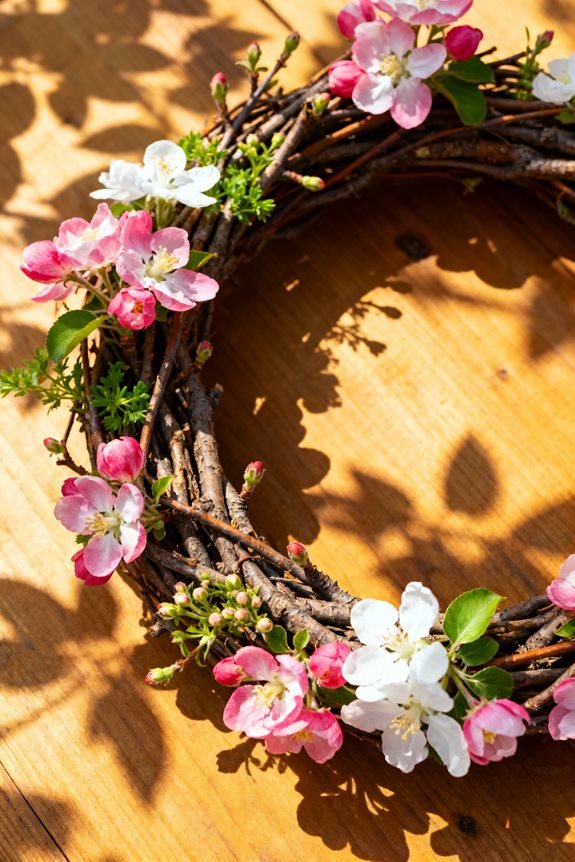
You’ll love how a spring wreath transforms your front door into a cheerful welcome, and the best part is that you can create one using materials right from your own backyard.
Start by taking a walk around your yard to gather flexible branches like willow or grapevine, along with early blooms such as forsythia, dogwood, or flowering quince.
Once you’ve collected your natural treasures, you’ll weave them together onto a wire frame or bend the branches into a circle, securing everything with floral wire and tucking in fresh flowers to create a beautiful, personalized decoration.
Gathering Natural Materials
The best spring wreaths start with a simple walk through your own backyard, where you’ll discover an abundance of free materials waiting to be transformed into something beautiful.
These nature walks become seasonal foraging adventures, connecting you directly to the changing season while gathering fresh blooms, supple branches, and verdant greenery.
Look for these perfect wreath materials:
- Flexible willow or dogwood branches that bend easily into circular shapes
- Early-blooming forsythia, cherry blossoms, or fragrant lilac stems
- Fresh moss, interesting seedpods, or delicate feathers
You’ll create something uniquely yours while embracing spring’s creative possibilities.
Assembling Your Wreath
With your collected treasures spread before you, creating the wreath base becomes your first hands-on task.
You’ll find that circular wreath types work beautifully with flexible branches like willow or grapevine. Weave fresh stems into a ring, securing them with floral wire at key points. Layer your blooms gradually, mixing textures and colors for depth.
Decoration techniques include tucking flowers into natural gaps, binding them with thin wire, or hot-gluing delicate petals. Don’t overthink placement—nature’s asymmetry brings authentic charm.
Step back occasionally to assess balance, adjusting until your creation feels both wild and intentional, perfectly capturing spring’s creative spirit.
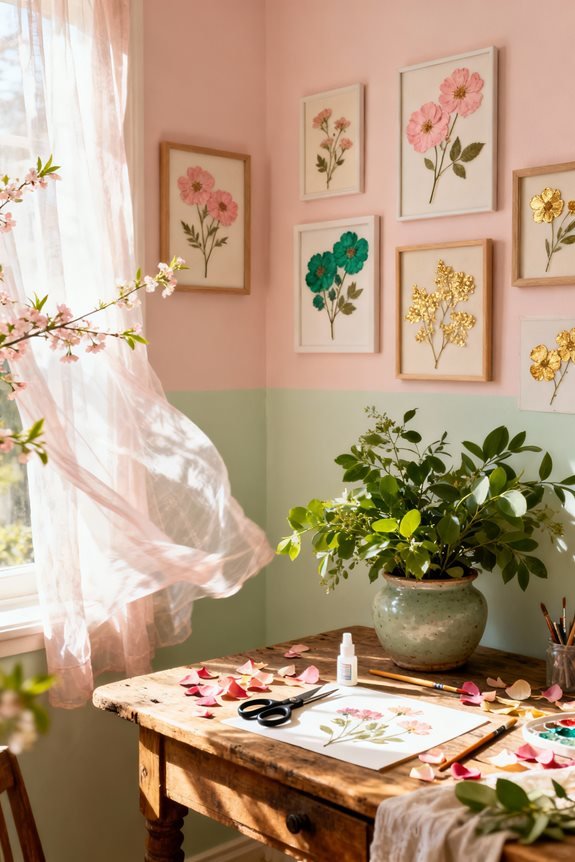
Turn Old Picture Frames Into Spring Wall Art
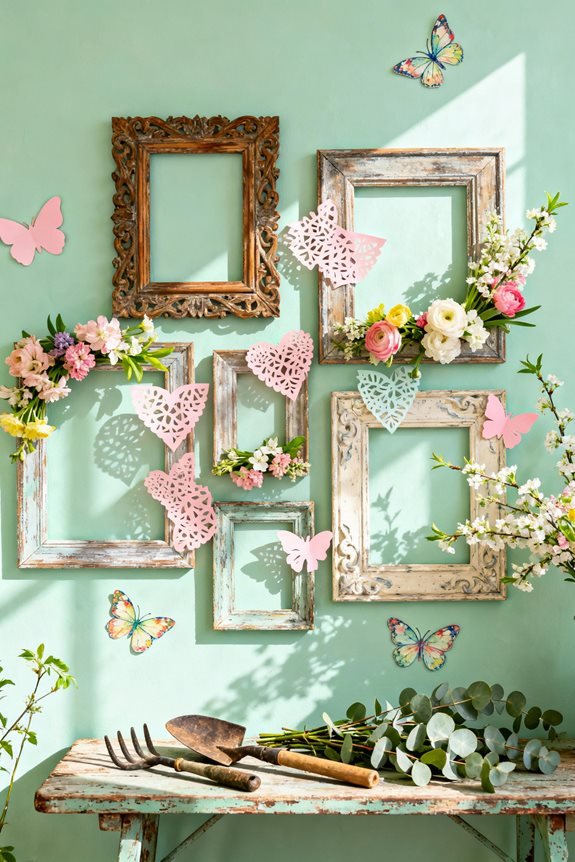
Old picture frames gathering dust in your attic or basement can transform into stunning spring wall art with just a little creativity and effort.
You’ll breathe new life into forgotten treasures while embracing seasonal themes that celebrate warmer days ahead.
Mix different frame styles to create an eye-catching gallery wall:
- Paint frames in soft pastels like mint green, blush pink, or buttery yellow
- Fill frames with pressed flowers, botanical prints, or fabric featuring spring motifs
- Layer frames of various sizes for dimensional interest
This budget-friendly approach lets you experiment with textures and colors, turning ordinary walls into inspiring focal points that welcome spring’s fresh energy.
Paint Terra Cotta Pots With Pastel Spring Colors
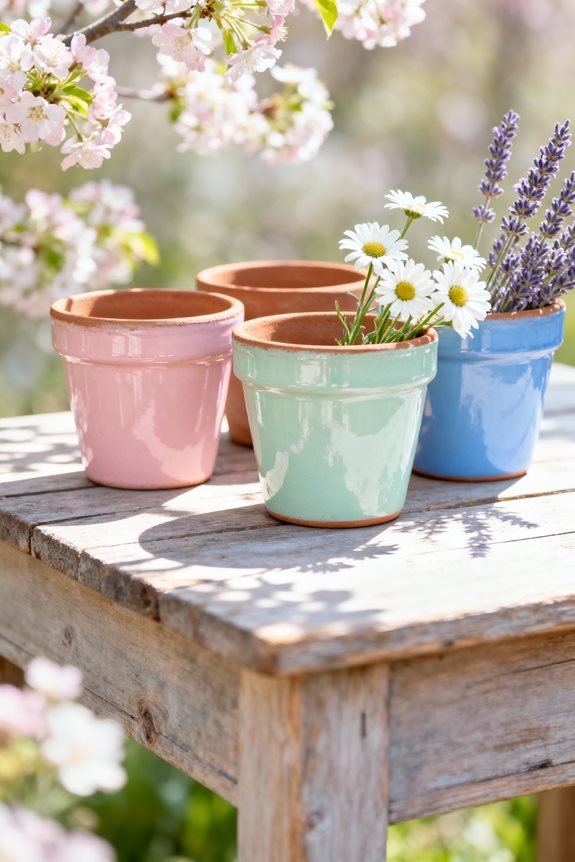
Terra cotta pots present a perfect blank canvas for adding cheerful spring touches to your indoor and outdoor spaces.
Transform plain terra cotta into stunning spring décor with simple painting techniques that bring vibrant personality to any space.
You’ll discover endless possibilities when you explore pastel color palettes featuring soft mint greens, buttery yellows, and delicate blush pinks.
Start by cleaning your pots thoroughly, then apply primer for better paint adhesion.
Experiment with terra cotta techniques like ombré effects, geometric patterns, or hand-painted florals that showcase your creativity.
Use acrylic paints designed for outdoor use, ensuring your designs withstand the elements.
These transformed pots instantly brighten windowsills, patios, and garden beds with fresh, contemporary spring style.
Create No-Sew Pastel Pillows for Your Living Room
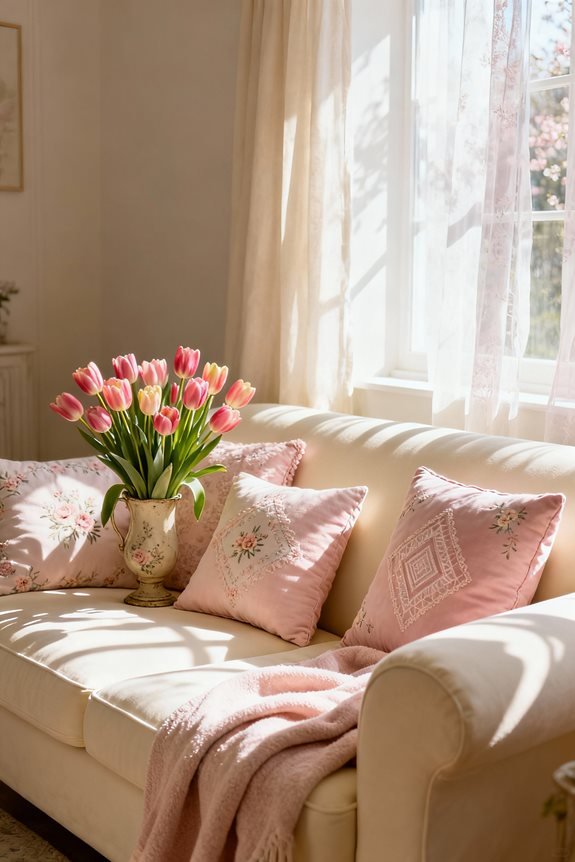


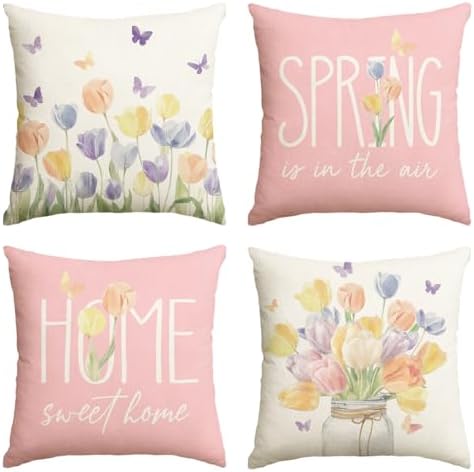
Bringing spring’s fresh palette indoors becomes even easier when you transform plain pillow covers into soft, inviting accents for your couch and chairs.
You’ll discover that no-sew techniques make this project incredibly accessible, requiring only fabric glue or iron-on tape to secure your fabric choices together.
Consider these innovative approaches:
- Select lightweight cotton or linen in mint, blush, or lavender hues
- Use fabric adhesive strips along edges for quick assembly
- Insert pillow stuffing through one open side before sealing
Your living room will instantly feel refreshed, welcoming the season’s gentle spirit through these handcrafted touches.
Transform Wooden Crates Into Rustic Spring Planters

Several weathered wooden crates you’ve tucked away in your garage can become charming containers for your favorite spring blooms, and the transformation requires minimal effort.
Start by lining each crate with landscape fabric to protect the wood while supporting sustainable gardening practices. Fill them with potting soil, then add vibrant tulips, daffodils, or cheerful pansies.
Landscape fabric creates a protective barrier between soil and wood while promoting eco-friendly gardening in your repurposed crate planters.
Stack multiple crates vertically to create eye-catching dimension on your porch, or arrange them horizontally along your walkway. This crate decor approach brings rustic warmth to any outdoor space while giving forgotten items new purpose.
You’ll love how these upcycled planters welcome guests with natural, inviting charm.
Print DIY Botanical Wall Art for Under $10
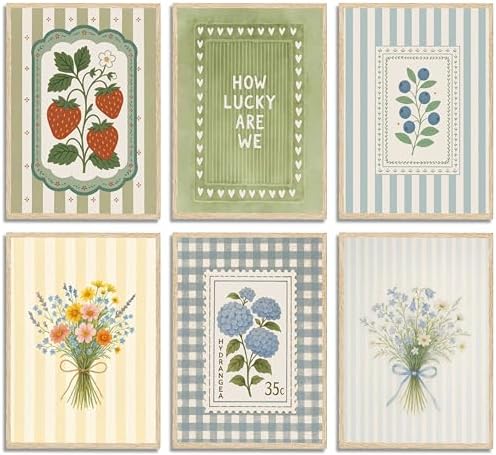

When you’re ready to bring the beauty of spring indoors without spending a fortune, printed botanical wall art offers the perfect solution. You’ll discover countless free botanical prints online through museum archives and public domain collections.
Simply download high-resolution images, then print them at home or your local print shop for minimal cost.
Consider these innovative approaches:
- Frame pressed flowers between glass panes for dimensional wall art
- Create a gallery wall mixing vintage and modern botanical prints
- Use clipboards as changeable frames for seasonal rotation
Your walls will showcase nature’s elegance while staying budget-friendly and fresh.
Craft Paper Flower Garlands for Your Mantel

Creating paper flower garlands transforms your mantel into a cheerful spring display that’ll brighten your entire room.
You’ll start by selecting colorful craft paper in shades that match your home’s style, then cut out simple petal shapes using templates you can make yourself or find online.
Once you’ve assembled your blooms and strung them together with twine or ribbon, you’ll have a custom decoration that looks expensive but costs just a few dollars to make.
Choose Your Paper Types
Before you start crafting your paper flower garland, you’ll want to select the right types of paper that’ll bring your vision to life. Consider these innovative options:
- Crepe paper offers wonderful texture variations and stretches beautifully to create realistic petals with dimension.
- Cardstock provides sturdy construction and holds color patterns vibrantly, perfect for long-lasting blooms.
- Tissue paper creates delicate, translucent flowers that catch the light and add ethereal beauty to your mantel.
Mix different papers together to achieve depth and visual interest. Your spring garland will feel uniquely yours when you experiment with various materials and textures.
Create Flower Templates
Templates transform your flower-making process from guesswork into an enjoyable, repeatable craft that produces consistent results every time.
You’ll discover endless flower patterns online, from simple five-petal designs to intricate roses and peonies. Print your chosen templates onto cardstock for durability, or trace them onto cereal boxes for a budget-friendly option.
Template sources include craft blogs, Pinterest boards, and free downloadable libraries that offer spring-specific designs. Once you’ve cut your master templates, you can trace them repeatedly onto your decorative paper, ensuring each bloom maintains perfect proportions.
This systematic approach lets you experiment with innovative combinations while building your mantel garland efficiently.
Assembly and Hanging Tips
Your paper flowers need a strong foundation to showcase their beauty, and twine or fishing line works perfectly as your garland base.
Thread each bloom carefully, spacing them to create visual interest along your mantel’s length.
Consider these hanging techniques to elevate your display:
- Secure endpoints with removable adhesive hooks to protect your mantel’s finish
- Layer multiple strands at varying heights for dimensional arrangement styles
- Mix flower sizes strategically, placing larger blooms as focal points
You’ll transform your space into a spring sanctuary that feels fresh and personalized, reflecting your creative vision.
Stencil Glass Vases With Spring Patterns
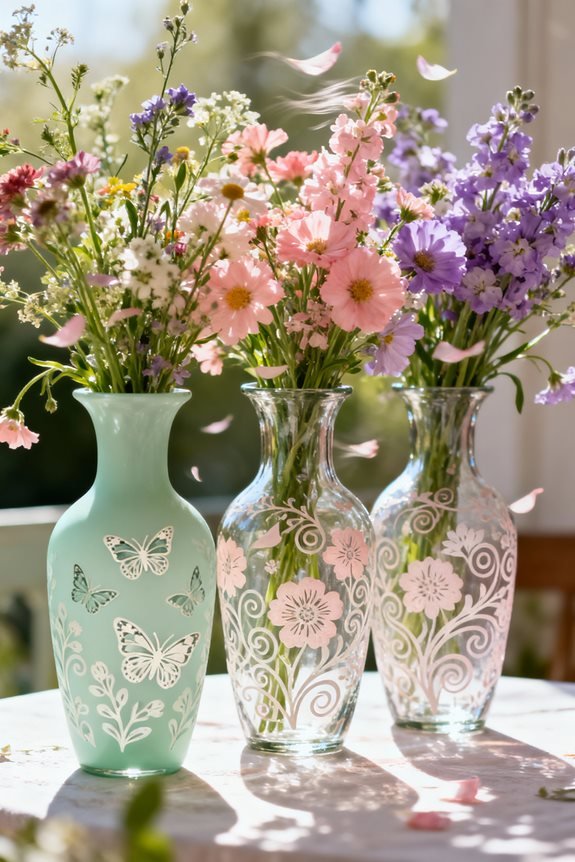


When spring sunshine streams through your windows, plain glass vases can transform into stunning seasonal displays with just a few stencils and some frosted glass paint.
You’ll discover endless possibilities by selecting floral patterns featuring tulips, daisies, or delicate cherry blossoms that capture spring’s essence.
The glass painting process couldn’t be simpler—secure your stencil with painter’s tape, dab the frosted paint with a sponge brush, and let it dry completely.
Mix different patterns on various vases to create an eye-catching collection. These personalized pieces bring warmth to windowsills, mantels, and dining tables throughout the season.
Build a Spring Centerpiece With Moss and Branches
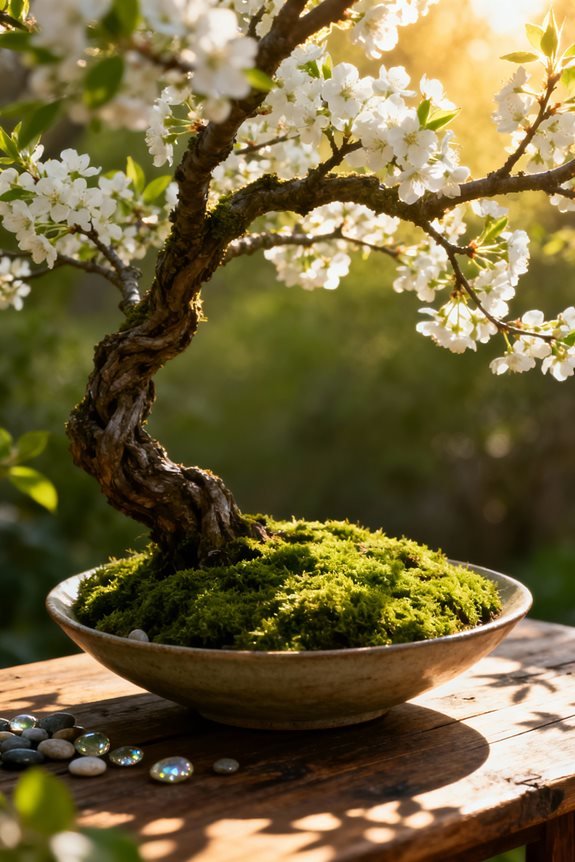
Creating a stunning spring centerpiece starts with a simple walk outdoors, where you’ll collect fresh moss, interesting branches, and any small flowering twigs that catch your eye.
Once you’ve gathered your materials, you’ll arrange them in a shallow tray or wooden box, layering the moss as a lush base and positioning branches at varying heights to add visual interest.
The beauty of this project lies in its flexibility—you can tuck in spring bulbs, nestle decorative eggs among the moss, or wrap twine around the branches to give your centerpiece a rustic, personalized touch.
Gather Natural Materials
Before you spend money at the craft store, step outside and discover the treasures already waiting in your backyard or local park.
Turn your morning walk into a nature scavenger hunt, collecting items that speak to you with their unique textures and colors.
Let seasonal inspiration guide your hands as you gather:
- Flexible willow branches and twigs with emerging buds
- Vibrant green moss from shaded areas near trees
- Interesting bark pieces, pinecones, and small stones
You’ll find that nature’s palette offers endless possibilities for creating something truly original and meaningful for your home.
Assembly and Arrangement Tips
Once you’ve brought your natural treasures inside, transform them into a centerpiece that captures spring’s awakening spirit by starting with a shallow bowl or wooden tray as your foundation.
Layer fresh moss across the base, creating soft texture that anchors your design. Consider your color palette carefully—mix vibrant pussy willows with delicate birch branches for visual interest.
Thoughtful item placement matters: arrange taller elements toward the back, cascading smaller pieces forward to create depth. Tuck in collected stones or bird’s nests between branches, building a composition that feels both intentional and organic, like spring itself emerging from winter’s rest.
Hand-Dye Table Linens in Fresh Spring Shades
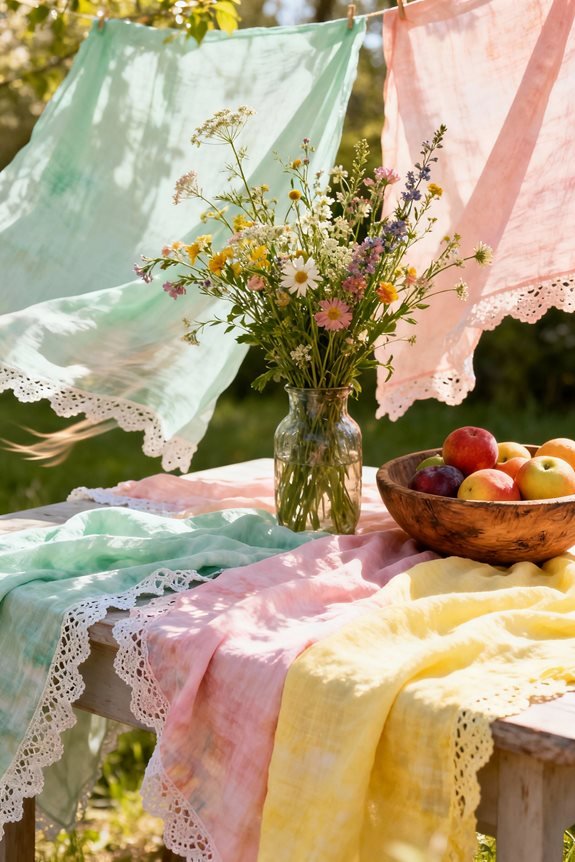
Hand-dyeing your own table linens transforms plain white napkins and runners into vibrant centerpieces that capture the essence of spring.
Transform ordinary linens into stunning spring centerpieces through the art of hand-dyeing with vibrant colors and personal creative flair.
You’ll discover that hand dyeing techniques open up endless creative possibilities, allowing you to craft unique pieces that reflect your personal style.
Start with these fresh approaches:
- Experiment with soft pastels like mint, lavender, and blush for delicate ombre effects
- Try color blending with complementary shades to create depth and visual interest
- Use natural dyes from beets, turmeric, or spinach for eco-friendly results
Your handcrafted linens will infuse every meal with warmth and seasonal beauty.
Frequently Asked Questions
How Do I Transition My Home From Winter to Spring Decor?
You’ll refresh your space by swapping heavy textiles for lighter fabrics and introducing spring scents like lavender or citrus. Studies show 80% of people feel happier with fresh floral arrangements, instantly transforming winter’s darkness into vibrant, innovative seasonal energy.
What Color Palette Works Best for Spring Decorating?
You’ll want to embrace soft pastel tones as your foundation, then layer in vibrant accents through floral prints and natural elements. This palette creates fresh, modern spaces that’ll energize your home’s atmosphere effortlessly.
How Can I Make My Spring Decorations Last Longer?
You’ll extend your spring decorations’ lifespan by choosing durable materials like weather-resistant fabrics and sealed wood. Opt for timeless seasonal themes rather than trendy designs, and store pieces properly between uses to maintain their freshness.
What’s the Best Way to Store Spring Decorations After the Season?
You’ll absolutely revolutionize your organization game by investing in crystal-clear storage solutions with seasonal labels! These innovative containers transform chaotic clutter into a streamlined system, ensuring you’ll find everything instantly next spring without frustration.
How Much Should I Budget for DIY Spring Decorating Projects?
You’ll want to allocate $50-150 for DIY budgeting, depending on your project planning scope. Start small with repurposed materials and thrifted finds, then expand as you discover which innovative techniques resonate with your creative vision.
As an amazon associate I earn from qualifying purchases.
Related posts:
 15 Fresh Spring Living Room Ideas You’ll Love
 Front Door Decorations for Spring
 How to Style Your Mantel for Easter: 20 Inspiring Decor Looks
 25 Stunning Yellow Living Room Ideas That Will Brighten Up Your Spring!
 11 Spring Decorating Ideas for the Home
 Best Spring Door Decorations That Welcome Guests
 Best Spring Door Wreaths That Boost Your Curb Appeal
 Best Front Door Floral Spring Doormats for a Warm Welcome