
18 Quirky Garden Ideas That Are Easy to Install
As an amazon associate I earn from qualifying purchases.


You can transform tired corners into vibrant spaces, stack upcycled materials into functional art, and weave creativity throughout your garden without breaking the bank. These eighteen ideas—from cascading tire planters to hand-painted birdhouses—prove that extraordinary outdoor sanctuaries don’t require professional expertise or expensive installations. Your garden’s potential awaits discovery through simple, inventive solutions that reveal something special around every corner.
Upcycled Tire Planters for Bold Vertical Interest
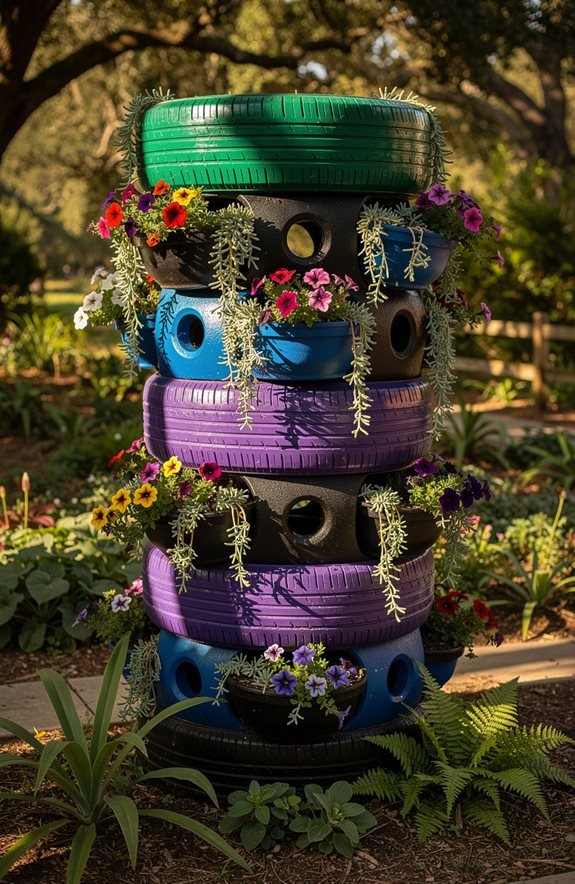
Transform your garden into a vibrant, dynamic space by stacking colorful painted tires into striking vertical towers that’ll catch everyone’s eye. This innovative approach to vertical gardening techniques creates depth and dimension while maximizing your planting area.
You’ll discover that tire planter aesthetics transform ordinary spaces into eye-catching focal points, especially when you paint them in bold, coordinating colors. Layer soil and plants within each tire, allowing flowers and trailing greenery to cascade beautifully.

The stacked design saves ground space, making it perfect for small gardens or patios. You’re creating an inspired sanctuary that reflects your unique style while embracing sustainable practices.
Watch as this quirky feature becomes a conversation starter, inviting admiration and sparking creativity in everyone who visits your reimagined outdoor haven.
Pallet Wood Raised Beds Built in an Afternoon
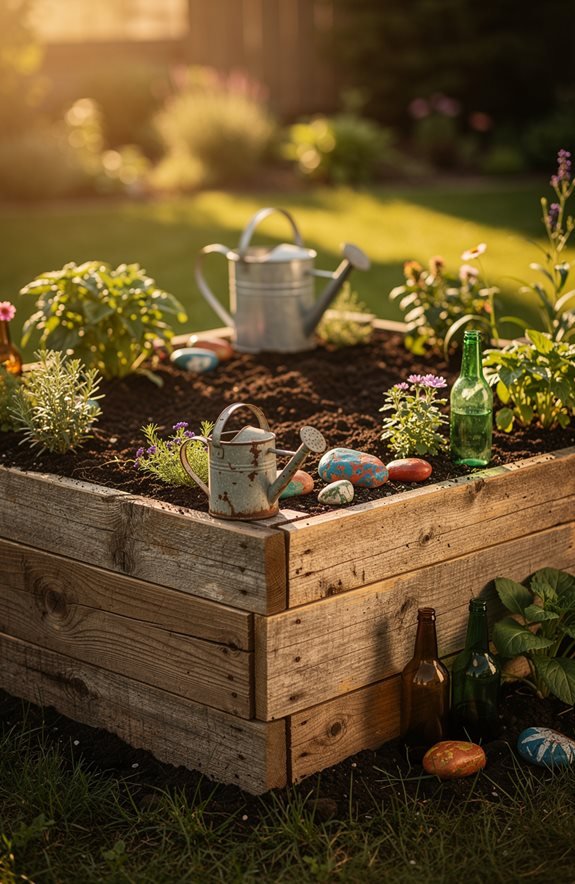
If you’re enthusiastic to grow your own vegetables but don’t have much time or experience, pallet wood raised beds are your answer.
You’ll love how quickly you can transform reclaimed materials into a thriving garden space.
Start by sourcing weathered pallets, which offer rustic pallet wood aesthetics that beautifully complement any garden style.
Stack four pallets into a rectangle, securing corners with galvanized screws—a smart afternoon installation tip that takes mere minutes.
Line the interior with landscape fabric to prevent weeds, then fill with rich soil.
Position your new bed in a sunny spot where vegetables flourish.
This innovative approach lets you garden immediately, without breaking the bank or spending your entire weekend.
Your homegrown harvest awaits.
Reclaimed Metal Wind Chimes
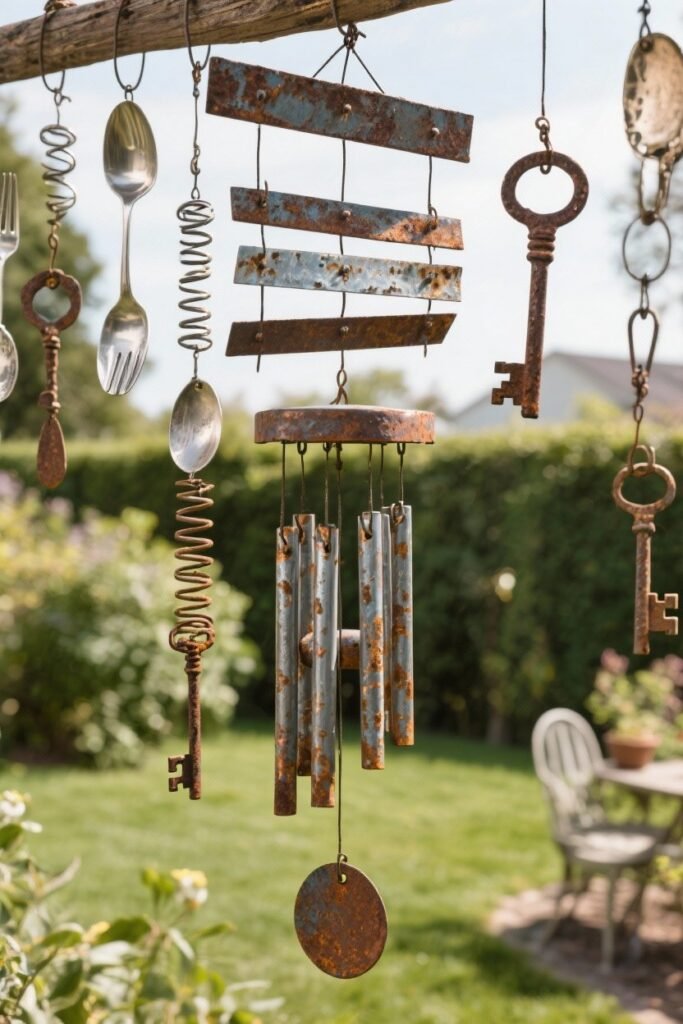
You’ll discover that sourcing reclaimed metal—old silverware, rusted springs, vintage keys, and weathered copper pieces—transforms your garden into a musical sanctuary while honoring sustainable craftsmanship.
Once you’ve gathered your materials, you’ll learn how proper spacing, hanging height, and metal selection create harmonious tones that dance through your outdoor space on gentle breezes.
Through thoughtful tuning and installation, you’ll craft wind chimes that blend artistic expression with functional garden décor, becoming a cherished focal point that celebrates both creativity and environmental stewardship.
Sourcing Reclaimed Metal Materials
Discovering forgotten treasures in salvage yards, antique shops, and online marketplaces opens up a world of creative possibilities for your garden. You’ll find everything from old silverware to vintage hardware, each piece brimming with character and history.
Local demolition sites offer substantial metal scraps, while estate sales frequently showcase unique finds waiting for new purpose. You can explore Facebook Marketplace, Craigslist, and specialized reclaimed material websites for budget-friendly options.
Don’t overlook junk shops and thrift stores, where hidden gems hide among forgotten items. This approach to reclaimed metal sourcing transforms waste into wonder, giving ordinary materials extraordinary second lives.
Your creative metal uses become a celebration of sustainability, turning your garden into a showcase of innovation and thoughtful design that reflects your distinctive style.
Installation And Sound Tuning
Once you’ve assembled your reclaimed metal wind chime, transforming it from scattered pieces into a cohesive creation, the real magic begins with thoughtful placement and careful tuning.
Hang your chime where gentle breezes naturally flow, perhaps near a garden entrance or beneath a sheltering tree branch. Position it away from harsh winds that’ll create chaotic clanging rather than melodic tones.
For acoustic tuning, strike each metal piece gently, listening to its unique frequency. You’ll discover that spacing between pieces dramatically affects your sound installation’s overall harmony.
Adjust the lengths of your hanging strings to create varied pitches, building layers of beautiful sound. This acoustic tuning transforms ordinary metal scraps into an inspiring, personalized symphony that celebrates your garden’s innovative spirit.
Upcycled Mirror Accents to Amplify Light and Depth
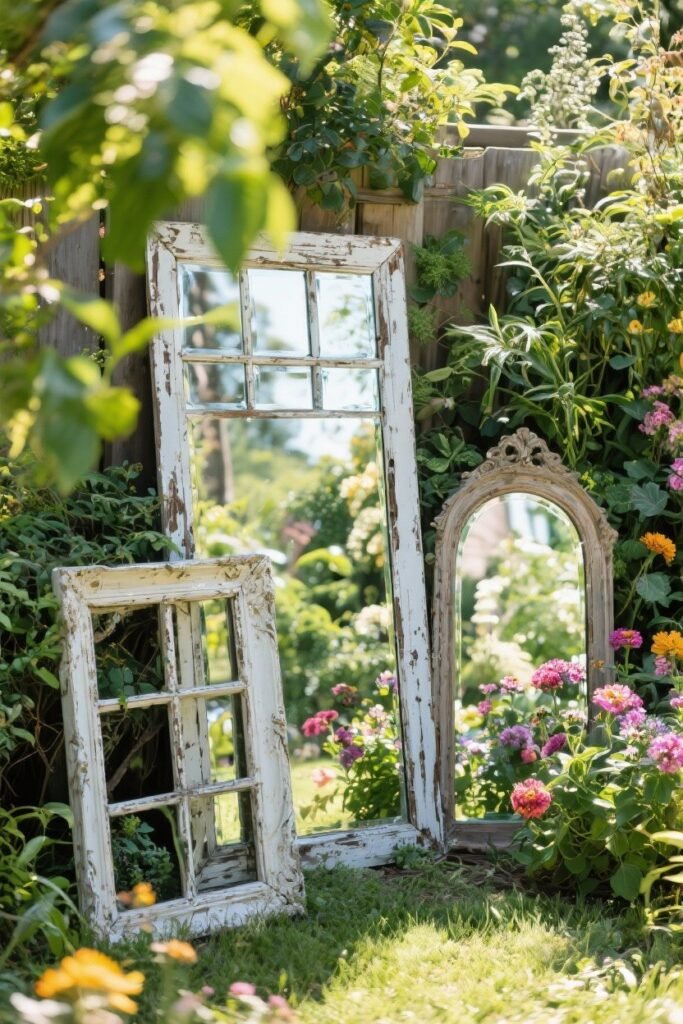
When you strategically position upcycled mirrors throughout your garden, you’re not just decorating—you’re creating visual magic that makes your space feel larger, brighter, and infinitely more inviting.
By sourcing old mirrors from thrift stores or salvage yards and carefully preparing them for outdoor use, you’ll transform discarded pieces into powerful tools that bounce sunlight into shadowy corners and reflect the beauty of your plants and flowers.
The key’s understanding how reflective surfaces work their illusion, then placing them where they’ll catch morning light or frame your garden’s best views, turning an ordinary space into something that feels truly enchanting.
Reflective Surfaces Create Illusions
By strategically placing mirrors throughout your garden, you’ll invoke a magical transformation that makes your outdoor space feel twice as large and brilliantly lit. This reflective gardening technique uses illusion tricks to redirect sunlight into shadowy corners, creating an enchanting depth that captivates visitors.
Position mirrors against walls or lean them among plants to bounce natural light across your landscape, illuminating hidden pathways and flower beds. The reflective surfaces bounce imagery back, crafting fascinating visual layers that intrigue the eye.
You’re not just adding decorative elements; you’re innovatively expanding your garden’s perceived boundaries. Old mirrors, metal sheets, or polished stones work wonderfully.
Watch how strategically placed reflections transform your outdoor sanctuary into a luminous, seemingly endless paradise that inspires wonder and relaxation.
Sourcing and Preparing Mirrors
Now that you’ve imagined how mirrors can transform your garden, it’s time to gather these magical pieces and get them ready for installation.
Mirror sourcing doesn’t require expensive purchases—scout thrift stores, estate sales, and online marketplaces for vintage frames and glass panels. Look for pieces with character that’ll spark joy when you discover them.
For mirror preparation, clean each surface thoroughly with vinegar and soft cloths, removing dust and grime.
Check frames for stability, reinforcing weak spots with waterproof sealant. Consider weatherproofing by applying protective coating to prevent rust and deterioration.
Measure your mirrors carefully, noting dimensions for placement planning. This thoughtful preparation guarantees your reflective accents‘ll catch sunlight beautifully, amplifying light throughout your garden while creating stunning depth that invites exploration and wonder.
Strategic Placement for Maximum Impact
Since mirrors possess the power to redirect light and expand visual space, choosing their locations is just as important as finding the mirrors themselves. You’ll want to position mirrors where they’ll catch morning or afternoon sunlight, amplifying brightness throughout your garden.
Place them strategically behind flowering plants or near seating areas to enhance garden aesthetics while creating intimate gathering spots. Consider your plant arrangement carefully—position mirrors to reflect blooms and foliage, doubling their visual impact.
You might angle mirrors toward shaded corners, instantly transforming dim spaces into luminous retreats. Lean larger mirrors against garden walls or fence lines for dramatic effect.
Repurposed Mason Jar Lighting for Evening Ambiance
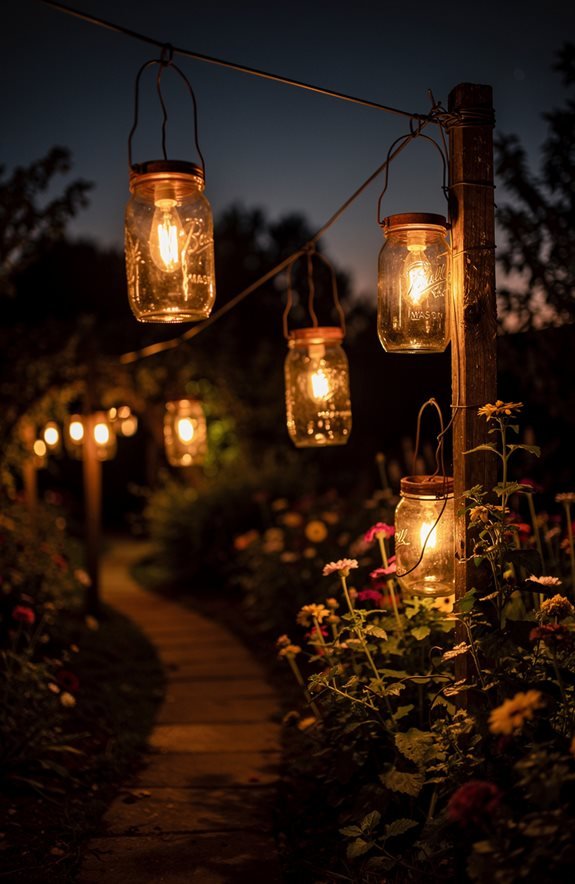
Transform ordinary glass jars into enchanting light fixtures that’ll turn your garden into a glowing retreat after sunset.
You can use various mason jar types—quart-sized vessels work wonderfully for ambient lighting, while smaller jars create delicate accents along pathways.
Fill each jar with battery-operated fairy lights or LED candles, then hang them from tree branches, fence posts, or shepherd’s hooks using sturdy wire or rope. The soft, warm glow creates an inviting evening theme that transforms your outdoor space into something magical.
Hang illuminated jars from branches and posts to create soft, magical evening ambiance that transforms your garden into an enchanting retreat.
You’ll appreciate how affordable this project is, requiring minimal supplies yet delivering maximum atmosphere.
Position your illuminated jars strategically throughout garden beds, near seating areas, or along borders. This innovative approach combines sustainability with stunning visual impact, making your evenings feel special and your garden feel alive with possibility.
Repurposed Door Trellises and Garden Backdrops
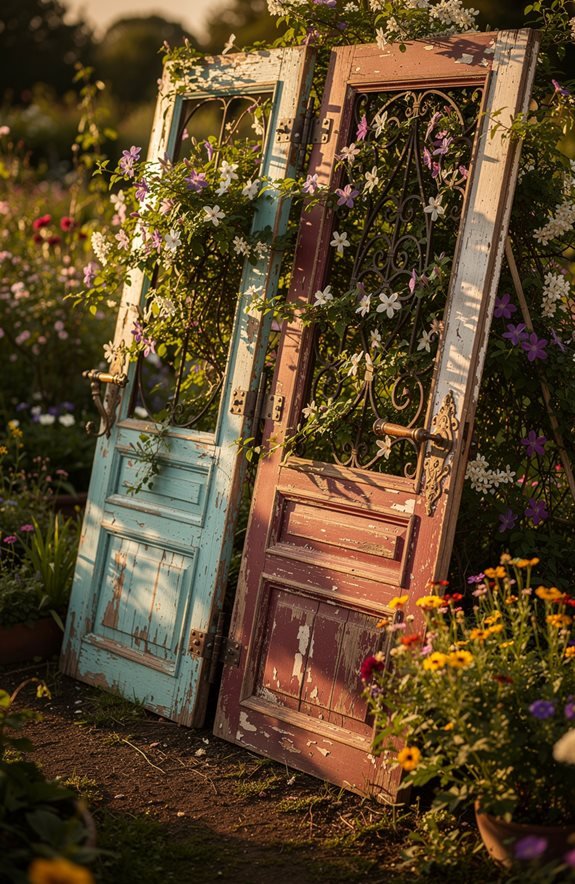
While those glowing mason jars create magic in your evening garden, you can build even more atmosphere by adding vertical interest and structure to your outdoor spaces.
Repurposed doors transform into stunning trellises that climb with flowering vines, creating natural focal points throughout your yard. You’ll discover that old wooden doors, positioned against fences or standing freely, become living artwork when covered with climbing plants like clematis or jasmine.
Your door garden becomes a vertical display of creativity and botanical beauty. These backdrops frame garden sections, define pathways, and maximize growing space in smaller yards.
The weathered patina of salvaged doors adds rustic charm while supporting lush greenery. This innovative approach combines practicality with aesthetic appeal, inviting visitors to explore hidden garden corners.
You’re not just gardening; you’re crafting an enchanting outdoor sanctuary that celebrates resourcefulness and natural growth.
Repurposed Ladder Display for Cascading Succulents
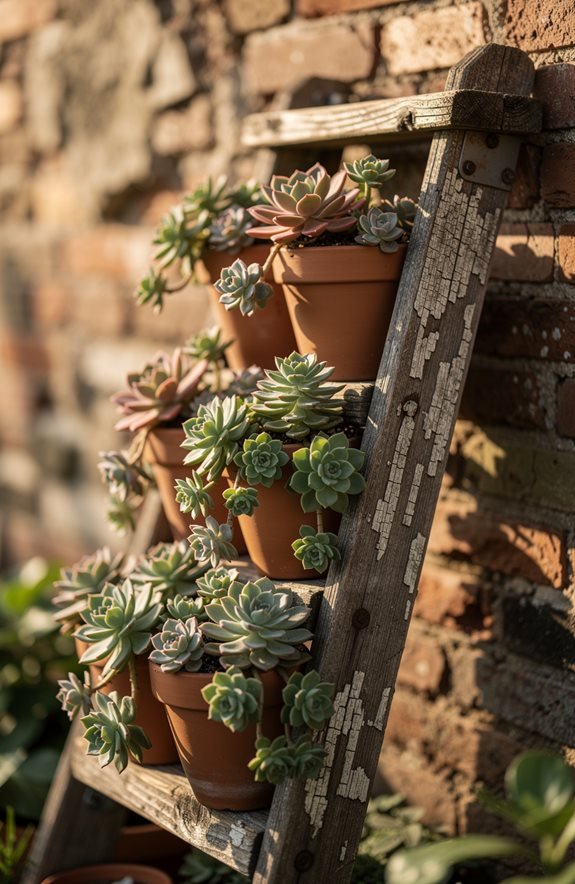
An old wooden ladder isn’t just for reaching high shelves anymore—it’s the perfect framework for creating a living masterpiece of cascading succulents.
You’ll position your ladder horizontally or at an angle, then secure small pots or planters between each rung. Guarantee ladder stability by anchoring it firmly to a sturdy fence or wall, preventing any wobbling that’d damage your plants.
Select diverse succulent varieties with trailing habits—echeveria, string of pearls, or jade plants work wonderfully. These hardy plants thrive with minimal water and sunlight, making them forgiving for beginners.
As your succulents grow, they’ll cascade beautifully down each level, creating an eye-catching vertical garden that transforms ordinary outdoor spaces into something truly extraordinary and inspirational.
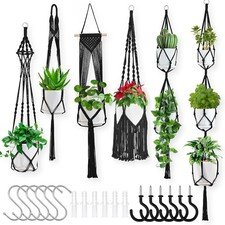
Macramé Plant Hangers for Bohemian Vibes
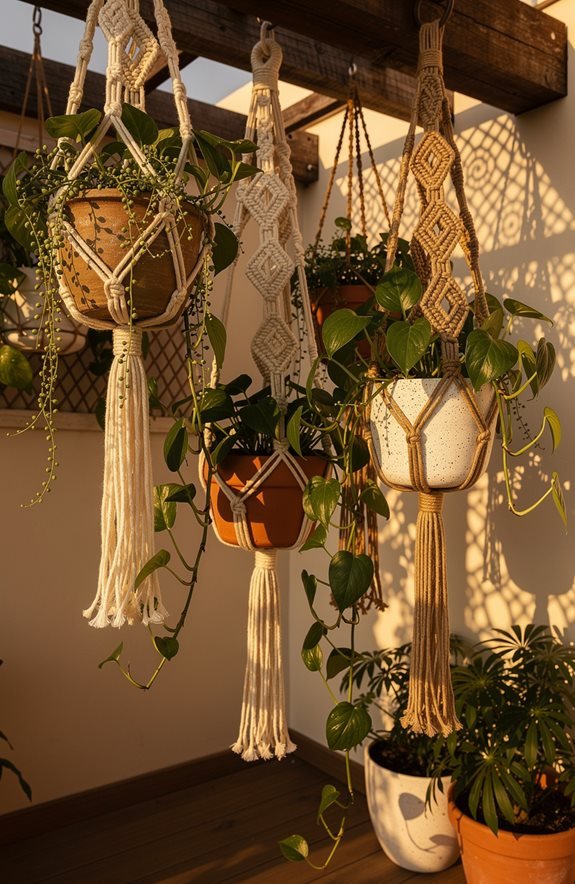

If you’re dreaming of a garden space that feels like a peaceful retreat, macramé plant hangers are your answer.
These knotted wonders bring bohemian aesthetics to any corner, transforming ordinary plants into stunning focal points. You’ll create layers of greenery that cascade beautifully, adding dimension and visual interest to your outdoor sanctuary.
Transform ordinary plants into stunning focal points with layered greenery that cascades beautifully, adding dimension to your outdoor sanctuary.
Making macramé hangers isn’t complicated—you simply need rope, basic knots, and creativity.
The process becomes meditative, connecting you with your space on a deeper level. Positioning these hangers near windows or pergolas maximizes both beauty and plant care by ensuring proper light exposure.
Your hanging garden becomes a personal statement, reflecting your innovative spirit while fostering a nurturing environment for succulents, pothos, or trailing flowers to flourish and thrive.
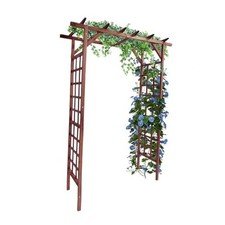
Driftwood Arbor Trellis for Climbing Vines
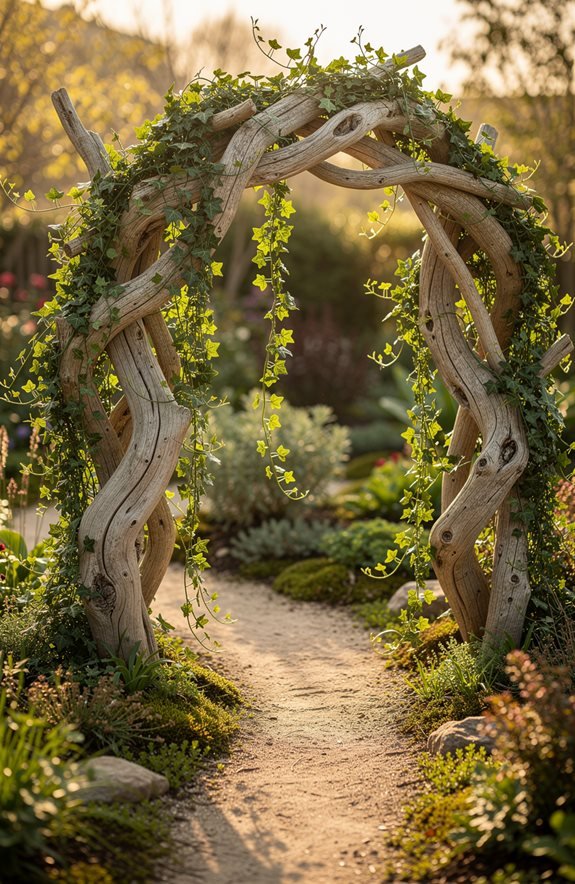
Weathered driftwood, with its silvery-gray patina and organic curves, becomes a stunning framework for your climbing vines when you construct a simple arbor trellis.

During driftwood selection, you’ll find pieces at beaches or garden centers that inspire your vision. Choose sturdy branches with natural character, arranging them into an A-frame or archway structure that suits your garden’s personality.
For vine attachment, you’ll use soft twine or plant clips to gently secure your climbing plants without damaging delicate stems. As your vines grow, they’ll weave through the driftwood’s texture, creating a living sculpture that transforms your outdoor space.
This innovative project blends coastal charm with natural gardening, offering you a distinctive focal point that celebrates both creativity and sustainability while inviting visitors into your thoughtfully designed sanctuary.
Painted Rock Borders That Define Garden Beds
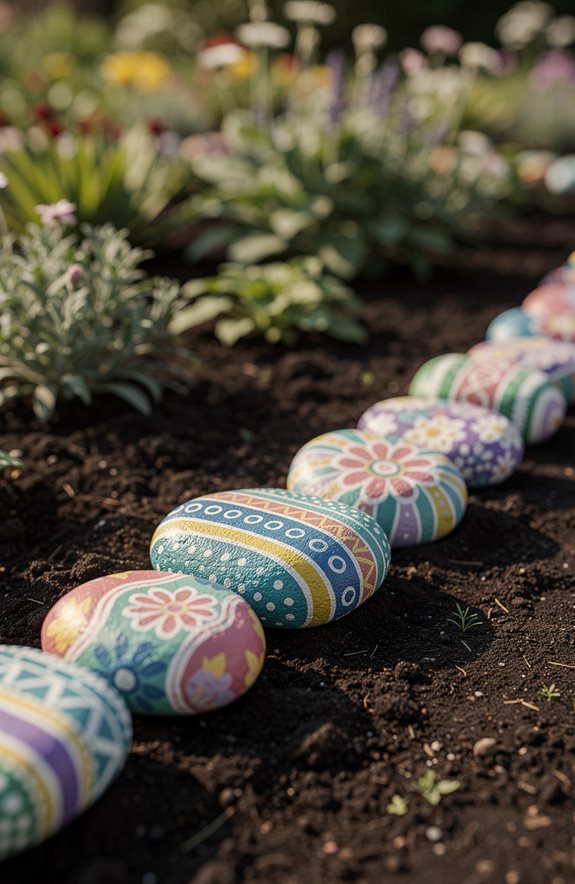
While your driftwood arbor draws the eye upward with climbing vines, painted rock borders ground your garden by creating crisp, colorful edges that frame your planting beds with personality.
You’ll transform ordinary stones into stunning focal points using weather-resistant acrylic paint, experimenting with painted stone designs that reflect your unique style.

Try geometric patterns, ombré effects, or whimsical illustrations that make your garden distinctly yours. Colorful rock patterns add visual interest while clearly defining bed boundaries, preventing soil erosion and maintaining neat landscaping.
Colorful rock patterns add visual interest while clearly defining bed boundaries, preventing soil erosion and maintaining neat landscaping.
Simply arrange painted stones along garden perimeters, creating instant structure and charm. This budget-friendly project requires minimal tools and delivers maximum impact, inviting visitors into a space that celebrates your creative vision and nurtures both plants and imagination.
Mosaic Stepping Stones From Broken Tile Scraps
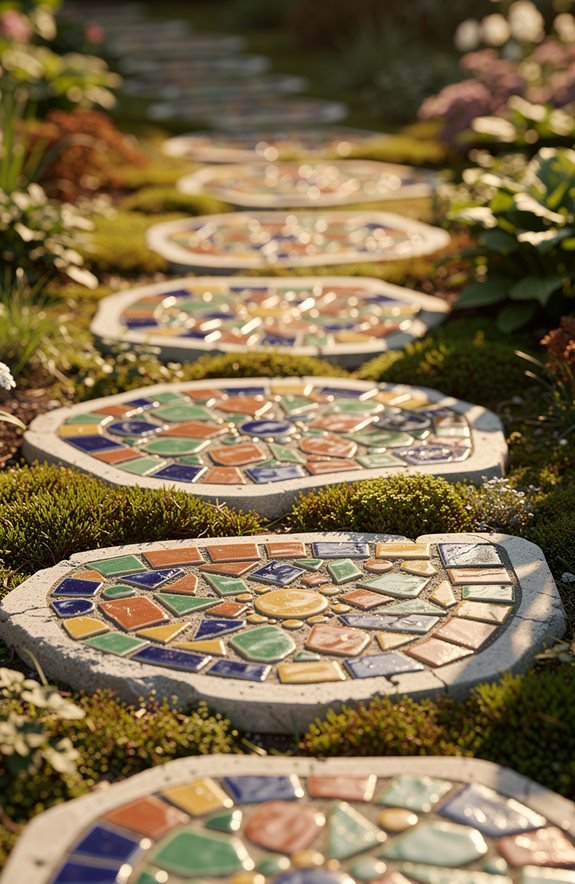

As you arrange your painted rock borders and admire how they frame your garden beds, you’ll discover that broken tile pieces—often discarded or forgotten—hold incredible potential for creating functional art.
Your mosaic design techniques transform these scraps into stepping stones that guide visitors through your garden while adding personality to pathways. Start with tile selection tips: choose weather-resistant ceramics in colors that complement your landscape.
Mix patterns, sizes, and hues to create visual interest that feels authentically yours. Arrange tiles on a concrete base, leaving small gaps for grout, then seal everything to withstand seasons ahead.
Each stone becomes a unique masterpiece, turning humble materials into garden treasures that spark joy every time you walk past them.
Painted Log Edging for Natural Garden Borders
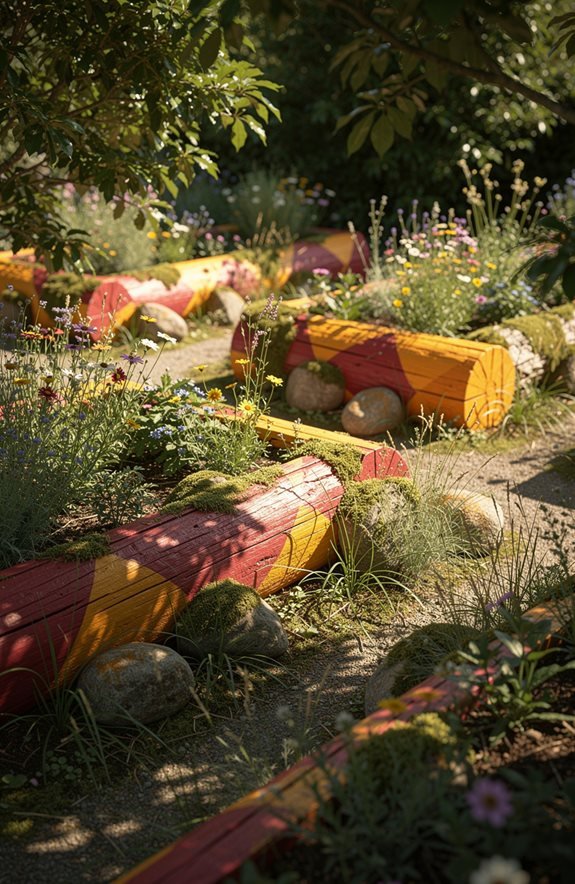
Once you’ve admired how mosaic stepping stones guide visitors through your garden, you’re ready to create natural borders that frame your beds with rustic charm.
Painted log edging transforms ordinary wood into stunning garden boundaries that blend seamlessly with your landscape.
Painted log edging transforms ordinary wood into stunning garden boundaries that blend seamlessly with your landscape.
Start by sourcing fallen logs or reclaimed timber, then apply log painting techniques using natural color palettes like soft grays, warm browns, and muted greens. These earthy tones complement any planting scheme while maintaining an organic aesthetic.
Position your painted logs along garden perimeters, securing them firmly into soil. This innovative approach creates defined spaces without harsh materials, inviting visitors to explore your thoughtfully designed sanctuary.
The weathered beauty of painted logs evolves beautifully over seasons, deepening your garden’s character and charm while requiring minimal maintenance.
DIY Bottle Watering Globes for Hands-Off Hydration
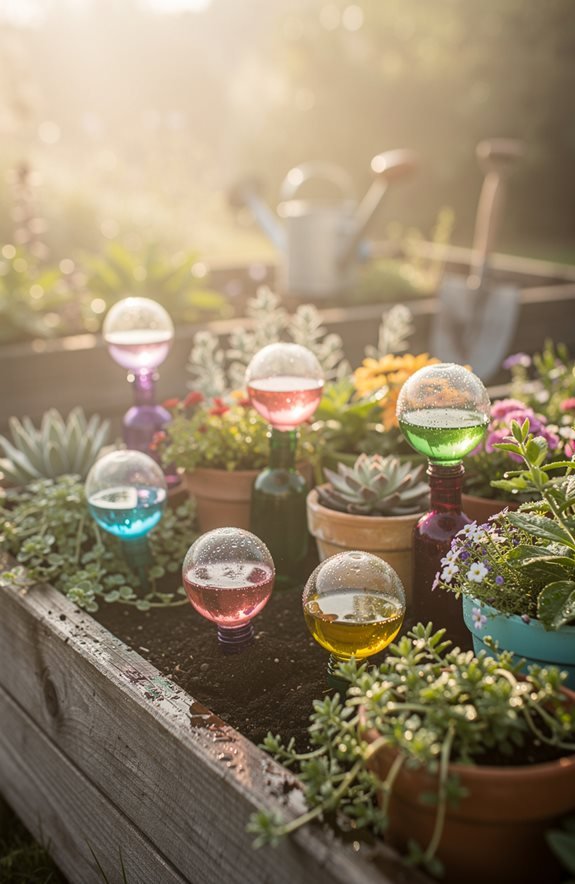
You’ll discover that bottle watering globes work by slowly releasing water as soil dries, creating a perfect balance that keeps your plants thriving even when you’re away.
The assembly process is wonderfully simple—you’ll just fill a glass globe with water, insert the stake into your soil, and watch as this clever device becomes your garden’s most reliable helper.
How Bottle Globes Work
Watering globes work through a beautifully simple principle: they release water gradually as your soil dries out, creating a steady, gentle hydration system that keeps your plants thriving without your constant attention.
When you fill a glass globe with water and insert its narrow stem into moist soil, the water stays contained. As your soil begins drying, air enters the stem, allowing water to trickle out slowly. This bottle globe functionality makes it an innovative DIY watering solution that eliminates guesswork.
You’ll love how this system adapts to your plant’s needs, delivering precise hydration throughout hot summers or busy weeks away.
The self-regulating mechanism guarantees your garden flourishes while you focus on other pursuits, transforming plant care into something effortless and inspiring.
Simple Assembly Process
Creating your own watering globe is wonderfully straightforward, and the best part? You’ll finish in minutes.
Start by gathering a glass bottle, a watering globe stake, and some soil or sand. Insert the stake into your bottle’s opening—it’s designed to fit snugly. Fill your bottle with water, then carefully invert it into your plant’s soil. The easy assembly means you’re ready to enjoy hands-off hydration immediately.
This quick setup requires no special tools or complicated instructions. You’re simply combining two components that work together beautifully.
Your globe releases water gradually as soil dries, keeping your plants thriving while you’re away. The simplicity makes this innovation perfect for busy gardeners seeking reliable plant care solutions that actually work.
Plant Watering Schedule Tips
Once you’ve assembled your DIY watering globe, understanding your plant’s specific needs becomes your next important step.
Different plant types require distinct watering methods, so you’ll want to observe how quickly your soil dries out. Succulents and cacti prefer longer intervals between waterings, while ferns and tropical varieties thrive with consistent moisture.
Fill your globe when the top inch of soil feels dry to the touch. For innovative watering methods, consider grouping plants with similar needs together, creating micro-gardens that share the same schedule.
Monitor your globe’s water level regularly, refilling as needed.
This personalized approach transforms plant care into a joyful routine, ensuring your green companions flourish while you enjoy hands-off hydration that celebrates your gardening journey.
Chalkboard Plant Labels for Care Info and Garden Humor
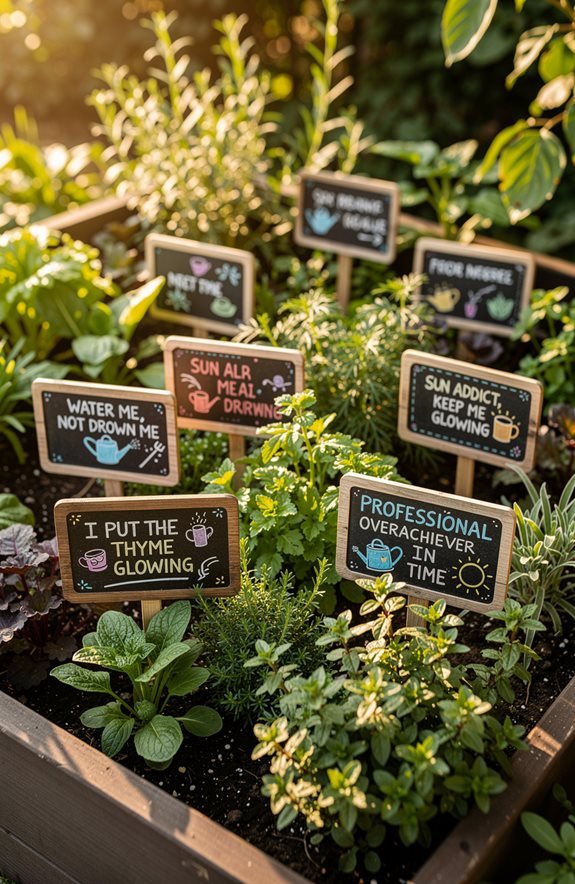
Plant labels don’t have to be boring—they’re actually the perfect place to blend practical care information with your personality and garden charm. You can transform simple chalkboard markers into creative labeling tools that showcase both function and flair.
Write watering schedules, sunlight needs, and planting dates on small chalkboard stakes positioned near each plant. This practical approach keeps you organized while adding visual interest to your garden beds.
Beyond care instructions, you’re free to add garden puns that celebrate your plants’ unique qualities. Perhaps you’ll label your tomatoes “vine-tastic” or your herbs “thyme well spent.”
These personalized touches make your garden feel uniquely yours, turning routine plant maintenance into an enjoyable, inspiring experience that visitors genuinely appreciate.
Hand-Painted Birdhouse Collections for Garden Charm
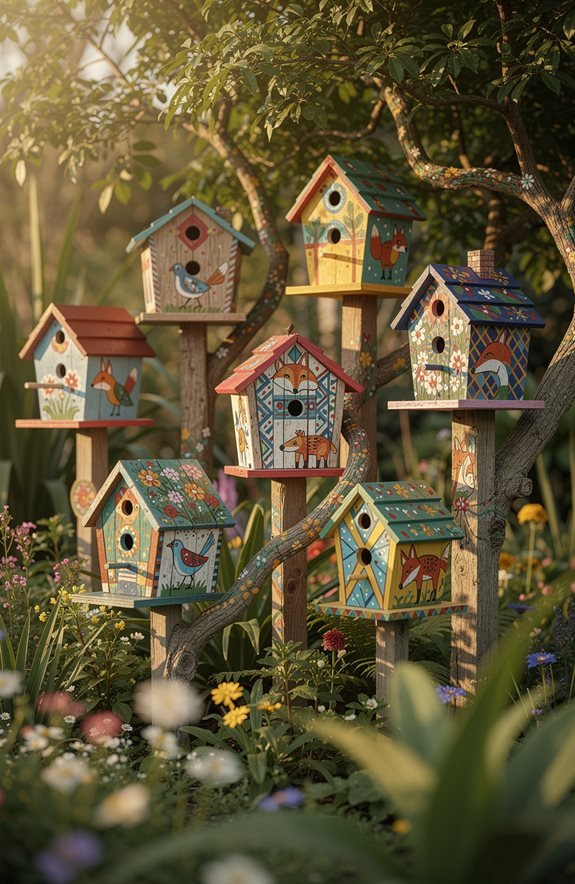


You’ll discover that hand-painted birdhouses aren’t just functional homes for your feathered friends; they’re living art pieces that transform your garden into a gallery of color and personality.
When you’re choosing your palette, consider colors that complement your existing garden design—soft pastels for a dreamy cottage feel, bold jewel tones for dramatic flair, or nature-inspired hues that blend seamlessly with trees and shrubs.
Strategic placement matters too; you’ll want to position your birdhouses where they’re visible from your favorite outdoor spots, ensuring they’re elevated, protected from harsh weather, and facing away from prevailing winds.
Designing Your Birdhouse Palette
When you’re ready to transform your garden into a vibrant sanctuary that celebrates both nature and creativity, hand-painted birdhouses offer an enchanting opportunity to blend artistry with wildlife welcome.
Consider your garden’s existing palette, then select birdhouse colors that complement your landscape while creating visual interest. You might choose soft pastels for a romantic feel, bold jewel tones for drama, or nature-inspired hues like sage and terracotta for cohesion.
Design themes range from whimsical patterns and botanical motifs to geometric shapes and celestial imagery. Let your personal style guide each birdhouse, creating a curated collection that reflects your innovative spirit.
This approach transforms functional structures into gallery-worthy installations that spark joy and inspire visitors while providing safe havens for feathered friends.
Installation Tips And Placement
Once you’ve painted your birdhouses with care and creativity, finding the perfect spots in your garden assures they’ll thrive as both functional homes and stunning focal points.
Consider garden orientation carefully—position houses where they’ll receive morning sunlight but afternoon shade, protecting feathered residents from extreme heat. Your space utilization strategy matters too; scatter birdhouses throughout different garden areas rather than clustering them together.
Mount them at varying heights on trees, fences, or posts to accommodate different bird species and create visual interest. Confirm each house faces away from prevailing winds and predators. Leave adequate clearance around entrances for safe flight access.
This thoughtful placement transforms your garden into a welcoming sanctuary where beauty and wildlife flourish together harmoniously.
Domino and Stone Mosaics for Garden Patterns

Creating beautiful mosaics in your garden transforms ordinary outdoor spaces into stunning works of art that’ll capture everyone’s attention.
You can arrange colorful dominoes or smooth stones to craft intricate mosaic design patterns that reflect your personal style. Start by sketching your pattern inspiration on paper, then gather materials in complementary colors and textures. Lay out your stones or dominoes on the ground first, experimenting with arrangements before permanently setting them in place.
You’ll discover that curved pathways showcase mosaics beautifully, drawing visitors through your garden like a treasure map. Mix different stone sizes and shades to create visual depth and movement.
Whether you’re designing geometric shapes or abstract compositions, these mosaics become focal points that celebrate your creativity and transform your outdoor sanctuary into an inspired retreat.
Sunken Container Gardens for Multi-Level Interest
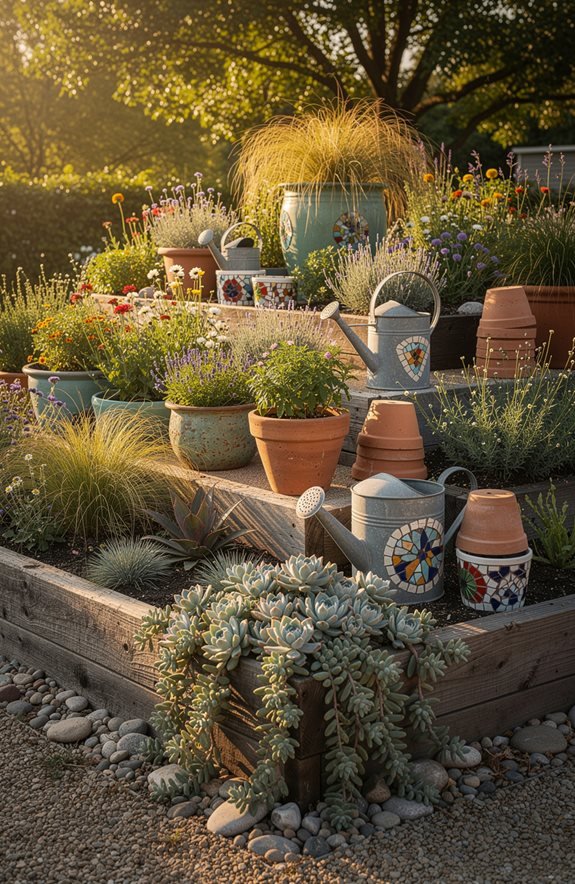
While mosaics bring horizontal artistry to your garden floor, sunken container gardens add another dimension entirely—one that lifts your eyes upward and draws you deeper into your outdoor space.
You’ll create stunning layered planting arrangements by nestling containers at varying depths, establishing visual rhythm that guides visitors through your garden. This sunken aesthetics approach transforms ordinary spaces into intimate, multi-level sanctuaries.
Dig shallow basins, then arrange pots of different heights within them—trailing plants cascading downward, upright specimens reaching skyward. You’re fundamentally sculpting with vegetation, crafting pockets of discovery around every corner.
The result? A cozy, three-dimensional garden that feels both innovative and inviting, rewarding exploration with unexpected beauty at every glance.
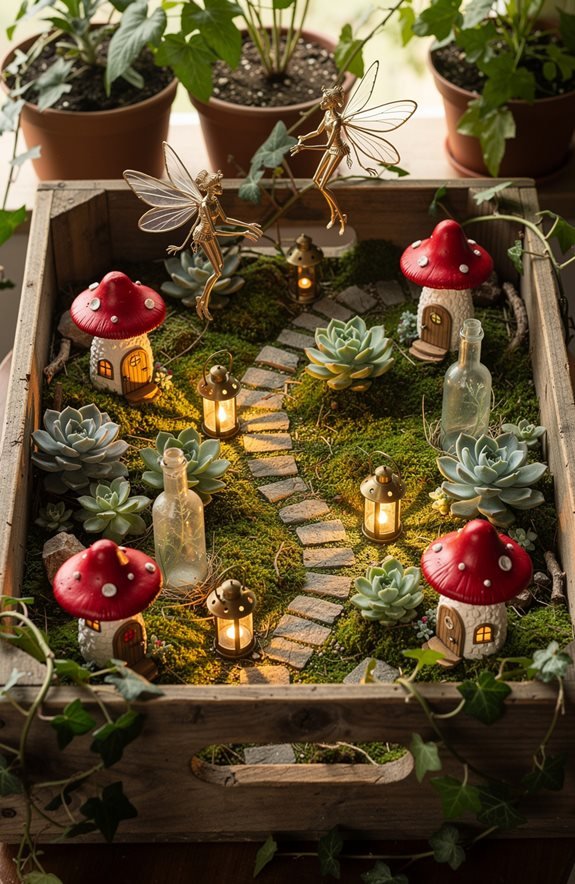
Build Miniature Fairy Garden Scenes in Wooden Boxes
Recommended products
Magicnight Frog Garden Statue with Solar Lights
Original price was: $32.99.$32.00Current price is: $32.00.
2-Pack Solar Fairy Garden Stake Lanterns
$37.00


If you’ve ever wished to shrink your garden into a pocket-sized world of wonder, wooden boxes offer the perfect canvas for creating enchanting fairy garden scenes.
You’ll transform ordinary containers into magical landscapes through thoughtful miniature landscaping, arranging tiny plants, moss, and stones to craft immersive environments. Layer your design with whimsical decorations—miniature benches, bridges, and fairy figurines—that spark imagination and delight.
Select shallow wooden boxes, fill them with well-draining soil, and position shade-tolerant plants like moss and sedums strategically.
Shallow wooden boxes filled with well-draining soil create the ideal foundation for positioning shade-tolerant plants like moss and sedums.
Add textured elements such as pebbles, driftwood, and bark to create depth and visual interest. Your fairy garden becomes a personal sanctuary, inviting you to pause, reflect, and reconnect with nature’s enchanting possibilities on an intimate scale.
Frequently Asked Questions
How Long Do Upcycled Materials Typically Last Outdoors Before Needing Replacement?
You’ll find upcycled longevity varies considerably—typically three to eight years outdoors. Material durability depends on your selection; treated wood outlasts untreated varieties, while metal withstands weathering better than plastic, making smart material choices essential.
What Tools and Skills Are Required for Someone With No DIY Experience?
You’ll need basic tools like hammers, screwdrivers, and saws. Essential skills include measuring accurately and following instructions. Most quirky garden projects don’t require advanced experience—you’ll learn innovative techniques through simple, hands-on practice.
Where Can I Source Free or Cheap Upcycled Materials for These Projects?
You’ll discover treasure troves of materials at local salvage yards and online marketplaces like Facebook Marketplace and Craigslist. These innovative sources offer endless upcycled possibilities that’ll revolutionize your garden without breaking your budget.
Do These Quirky Garden Ideas Work Well in Small Spaces or Apartments?
You’ll absolutely thrive with quirky gardens in small spaces. Container gardening and vertical planters let you maximize limited square footage while innovating your apartment’s aesthetic. You’re creating functional art that transforms compact living.
How Do I Weatherproof and Maintain These DIY Garden Decorations Year-Round?
You’ll shield your creations like a fortress against nature’s assault by applying weatherproofing techniques—sealants, rust-resistant coatings—and executing seasonal maintenance rituals that keep your innovative decorations thriving year-round.
As an amazon associate I earn from qualifying purchases.
Related posts:
 Best Outdoor Privacy Screens With Planters That Transform Any Yard
 Bicycle Flower Planters: 10 Top Picks for Gifts & Garden Decor
 The 13 Best Lighted Christmas Garden Flags of 2025 – Festive Outdoor Décor
 Stunning Spring/Summer Outdoor Decor Ideas
 10 Funny Hanging Planters That’ll Make Your Garden the Talk of the Block
 Garden Sun Calculator Tool: Find the Best Plants for Your Light Level
 6 Different Quirky Miniature Garden Ideas That Are Easy to Install
 Porch Pots Christmas Ideas